Flexi Post Grid includes a powerful Product Grid layout that allows you to display WooCommerce products in a modern card-style grid.
With this layout you can display:
- Product image
- Price
- Rating
- Color swatches
- Wishlist button
- Add to Cart button
The Product Grid layout provides extensive design and functionality controls, allowing you to create a fully customizable product showcase.
Step 1: Select Product Grid Style #
To display WooCommerce products, first choose the Product Grid style inside the grid widget.
Go to:
Grid Widget → Grid Style Types → Product Grid
After selecting this option, the widget will automatically load product-specific settings and styling controls.
These controls only appear when the Product Grid layout is selected.
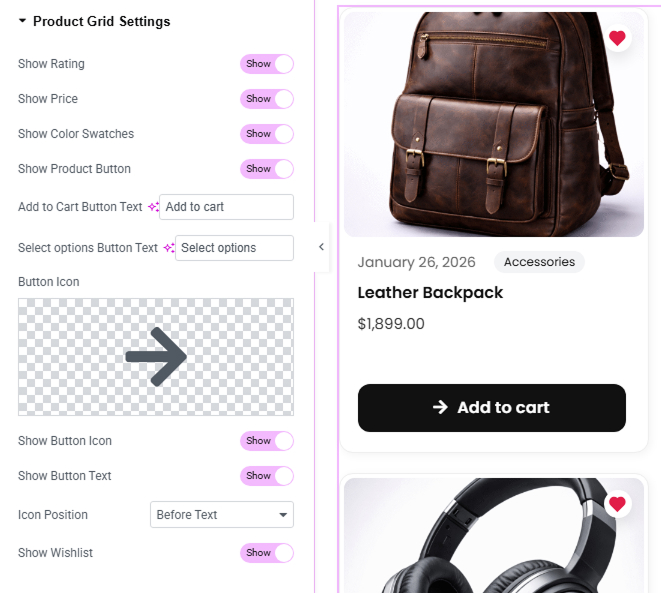
Step 2: Configure Product Grid Settings #
Inside the widget settings you will see Product Grid Settings, where you can control which product elements appear inside each grid card.
Available options include:
Show Rating #
Enable or disable the WooCommerce product rating display.
Show Price #
Displays the product price on the grid card.
Show Color Swatches #
Displays available product color options using circular swatches.
Show Product Button #
Shows the main product button such as Add to Cart or Select Options.
Add to Cart Button Text #
Customize the label used for the Add to Cart button.
Select Options Button Text #
Customize the button text for variable products.
Button Icon #
Upload or select an icon to display inside the product button.
Show Button Icon #
Enable or disable the button icon display.
Show Button Text #
Enable or disable the button label.
Icon Position #
Choose whether the icon appears before or after the button text.
Show Wishlist #
Displays a wishlist icon on the product card.
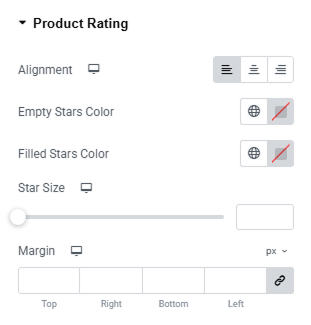
Step 3: Customize Product Rating Style #
You can fully customize the appearance of the WooCommerce rating stars.
Go to:
Style → Product Rating
Available options include:
- Alignment
- Empty star color
- Filled star color
- Star size
- Margin spacing
This allows you to match the rating design with your website style.
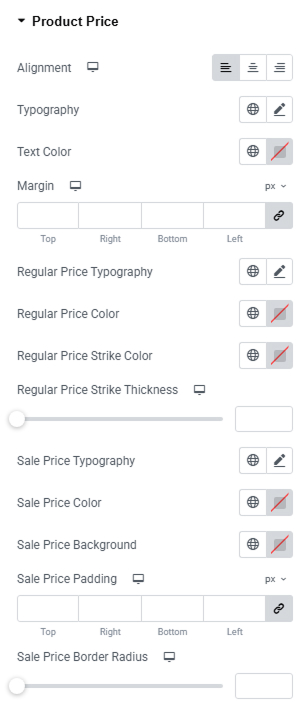
Step 4: Customize Product Price Style #
The Product Price styling panel allows you to design how prices appear inside the grid.
Go to:
Style → Product Price
You can control:
- Price typography
- Text color
- Alignment
- Margin spacing
Additional styling options are available for:
Regular Price #
- Typography
- Color
- Strike-through color
- Strike-through thickness
Sale Price #
- Typography
- Text color
- Background color
- Padding
- Border radius
These options allow you to highlight discounted products visually.
Step 5: Configure Product Color Swatches #
Flexi Post Grid supports WooCommerce product color swatches.
These allow customers to preview product color options directly inside the grid.
Enable Color Swatches #
Go to:
Plugin Settings → Product Grid → Product Options
Enable:
Enable Product Color Swatches
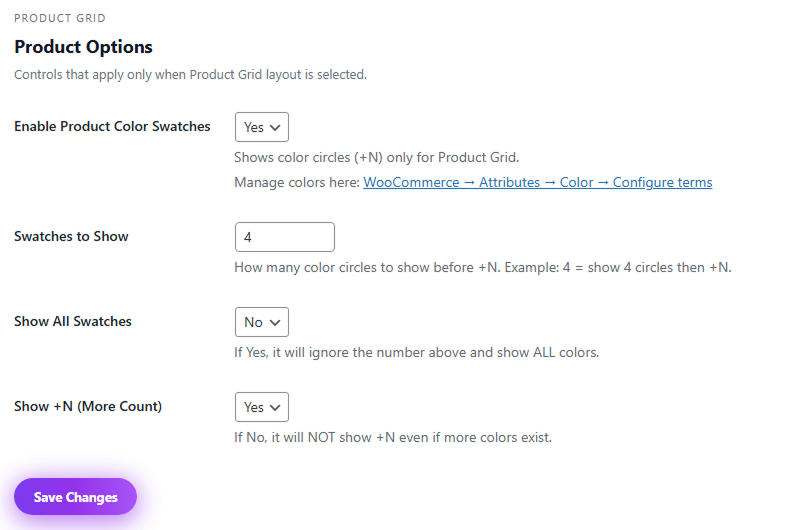
Swatch Settings #
Available options include:
Swatches to Show
Controls how many color circles appear before the “+N” indicator.
Example:
If set to 4, the grid will show four colors and then display +N for additional colors.
Show All Swatches
Displays all available colors instead of limiting the number.
Show +N (More Count)
Displays the “+N” indicator when additional colors exist.
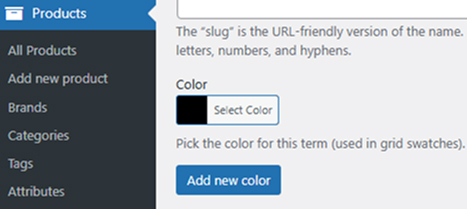
Managing Product Colors #
Product colors can be configured from WooCommerce attributes.
Go to:
WooCommerce → Products → Attributes → Color
Then assign colors to each attribute term.
These colors will automatically appear as swatches in the product grid.
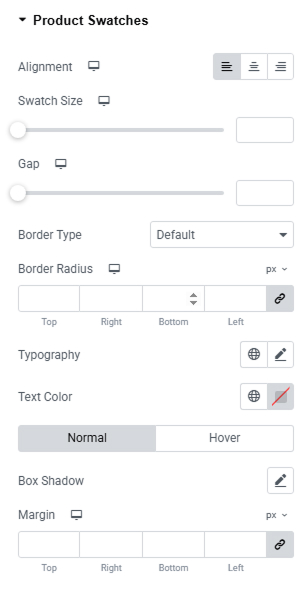
Step 6: Customize Swatch Styling #
Swatch appearance can be styled using the widget style panel.
Go to:
Style → Product Swatches
Available styling options include:
- Alignment
- Swatch size
- Gap between swatches
- Border style
- Border radius
- Typography
- Text color
- Box shadow
- Margin spacing
This allows you to match swatches with your store design.
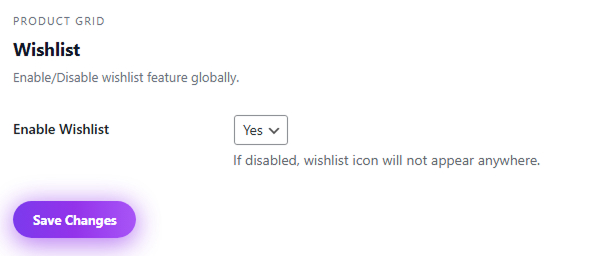
Step 7: Enable Wishlist Feature #
Flexi Post Grid includes a built-in wishlist feature for product grids.
You can enable this globally from plugin settings.
Go to:
Plugin Settings → Product Grid → Wishlist
Enable:
Enable Wishlist
Wishlist Shortcode #
To create a wishlist page, use the following shortcode:
[fpg_wishlist]Add this shortcode to any page to display the user’s saved wishlist products.
Example:
- Create a new page called Wishlist
- Insert the shortcode
- Publish the page
Visitors can then view and manage their saved products.
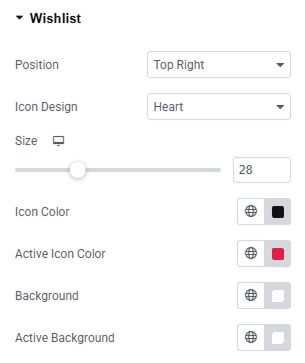
Customize Wishlist Style #
Wishlist icon appearance can be customized in the widget style panel.
Go to:
Style → Wishlist
Options include:
- Icon position
- Icon design (heart or other styles)
- Icon size
- Icon color
- Active icon color
- Background color
- Active background color
These settings allow you to match the wishlist icon with your website theme.
How Product Grid Works #
When the Product Grid layout is selected:
- WooCommerce products are automatically loaded
- Product price and ratings are displayed
- Color swatches appear for products with color attributes
- Wishlist icon allows users to save products
- Add to Cart button allows quick purchase actions
This creates a complete WooCommerce product browsing experience directly inside the grid layout.
Product Grid Best Use Cases #
Product Grid works well for:
- WooCommerce shop pages
- Featured products sections
- Product landing pages
- Home page product showcases
- Category product displays
Because of its flexible design controls, it can be used for modern eCommerce layouts without additional plugins.


